Assignment 3 blog 5 -Reflection
Hello and welcome to my final MUVE601 blog. In this blog i will be reflecting on my process and the final outcome of my metal gear project for assignment 3 and the MUVE course.

Overall i found MUVE to be a very interesting fun course to take part in.I didn’t realize how large and complex the second life community was seeing as this was the first time i have played in the sim; so it was fun learning about how it all works and building my final project was also entertaining. Thanks Isa for teaching us the basics and showing us around.
For a reflection on the process of my project, i have to say it took a lot longer then i thought it would; Especially the scripting (I’m not a scripting major) so i had a little difficulty there, though the scripts i needed were already written by someone else; i did have a go at writing them myself 🙂
Mostly i didn’t run into any problems along the way, with everything i had trouble with i just did some research into it which there is plenty of second life resources online, such as how to make sculpties in a program, import them and res them.
The parts of the project i enjoyed the most where creating the overall metal gear using prims and then bringing it to life with the use of textures, it was cool to watch the development of a build from an idea to final the finished model.
Thanks to anyone that has seen or followed my blog, maybe i’ll see you in Second Life in future!
Assignment 3 blog 4 – Scripts and effects
Welcome to another MUVE601 blog. In the last two blogs i showed my progress of creating the metal gear though the use of prims and then bringing it to life with texturing. In this blog i will be showing how i used scripts, particle effects and texture effects to add more to the metal gears visual complexity.

For the first effects i wanted, i thought smoke or steam coming from the vents on metal gear would look cool. So first i had to find a place that had scrips i could use. This had me do a trip to the particle laboratory in second life. This is where i found a smoke script.
I added it to a prim, made it 100% transparent and placed it to where i wanted it; once it was placed i the linked it to the metal gear. I did this for all three vents.
This is what the finished result looked like.

For the second set of particle effects i wanted to add, i wanted some blue flames coming from the cannon. Much like the first set of smoke effects, the script was found at the particle laboratory. I applied them to a transparent prim like before, and put them into place and then linked them to the main cannon.

Here a picture of the cannon with the flame particle effects. Glow was also added to the cannon to add more effect.

Now i wanted to use a script to add rotation to the radar. The scrip i used was provided during one of the MUVE classes where Isa was teaching some scripting. I applied it to the tube inside the radar and edited the scrip so it rotated on the x axis. Then i linked the rest of the radar prims which made the whole radar rotate. I also added transparency to the front of the radar for more effect.
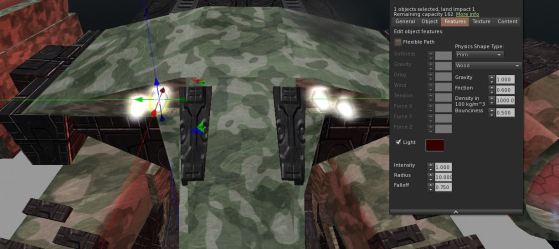
Next i wanted to add some light to the front of the metal gear. To do this i spawned a cylinder prim, made it 30% transparent to give it the look of glass, made it 100% glow and then in the features options checked the light option. This gave a good effect of a light. I copied the prim 3 more times an placed them on the metal gear.

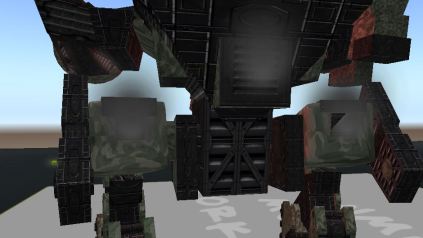
The console image that would be made into an animated prim.
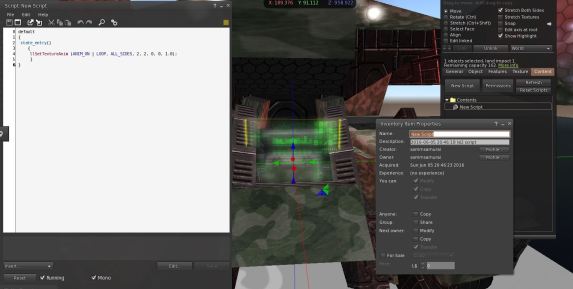
For the last script i wanted to add a animated futuristic console to the cockpit of the metal gear. I wasn’t sure how to go about this, so i did some research and found a script that plays in segment, each quarter of a texture that applied is to a prim. The script was very simple being 1 line in total, but was very effective, giving the effect of a working console.
Once the console script was working on the prim i add transparency and glow to add more effect.
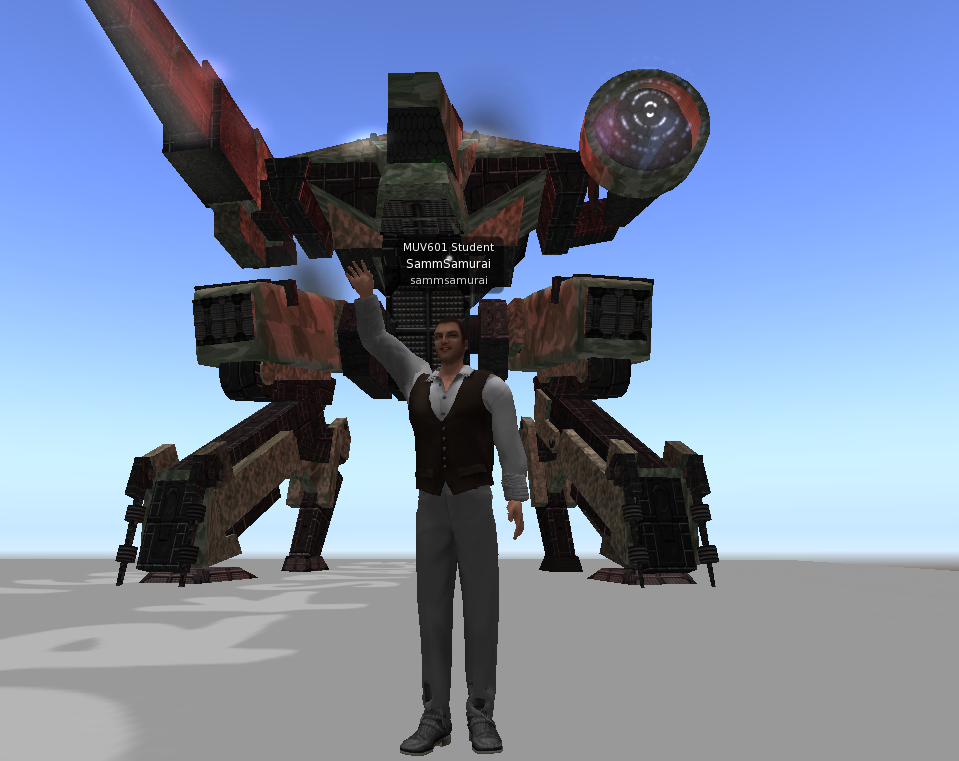
The metal gear finally done, scripts and particle effects applied.
In summary i have completed 6 tasks for the visually complex build, all documented in the blogs; these are:
- An appropriate particle system: Three seprate partical scrips used for the vent smoke, cannon fire and radar waves.
- The use of at least two sculpties: Two sculpties made using a sculping program applied to the legs of the metal gear.
- Prim movement through scripting: A script that rotates the radar.
- An instance of a prim with Light: Lights created for the front of the metal gear using the lighting option in the bulding menu.
- An animated texture: An animated console added to the metal gear cockpit.
- The use of at least three textures with transparency: Transparency applied to the console, radar and lights.
Assignment 4 blog 3 – Textures and more progress
3Welcome to another MUVE601 blog. For this blog i will be showing some more progress for my visually complex content creation. In my last blog i finished building the required prims and suclpties for my metal gear, so for this blog i will be putting it all together and adding textures.
First i needed to find some appropriate textures for my build. To do this i needed to think of the theme of what my metal gear would look like. When i came up with some ideas i went searching for the textures.
The first theme i wanted was a metal camouflage texture, this would cover the majority of the metal gear. After searching Google images and downloading some textures i came to decision on what texture i would use.

This texture was the final decision, this was because it would repeat good and had some scratch texture to it to give it some more depth.

Next i needed some metal style textures. After some searching i found some good textures by using the search term “Sci-fi textures”. Now i had the textures i had to apply them to the metal gear model.

For the first parts of the metal gear i textured, i started with the legs. I used the default mapping and adjusted the horizontal and vertical scales so the texture fitted nicely to each of the prims. Using the select face tool in the textuing options, i also applied multiple textures to one prim, where i thought it appropriate.

Next, i started texturing the body. This took me the longest time out of all the texturing because it involved a lot of adjusting of the horizontal and vertical scales and rotations to make sure the textures fitted correctly.

For last things i needed to texture were the cannon and radar. Just like the legs and body this involved applying the textures to the prims and adjusting the scales so they fitted nicely.

The finished metal gear fully textured!
It took a long time to texture all the parts, but i got there in the end! For the next blog i will be covering scripts.
Here are some things I’ve completed this blog:
- The use of different textures and colors throughout the build with consideration given to using appropriate textures, texture repeats, offsets and rotations: I used multiple textures and made sure they fitted correctly though the use of repeats, rotations and horizontal and vertical scales.
- The appropriate use of multiple textures on a prim: Many of the prims have more then one texture applied to it.
Assignment 3 blog 2 -Development
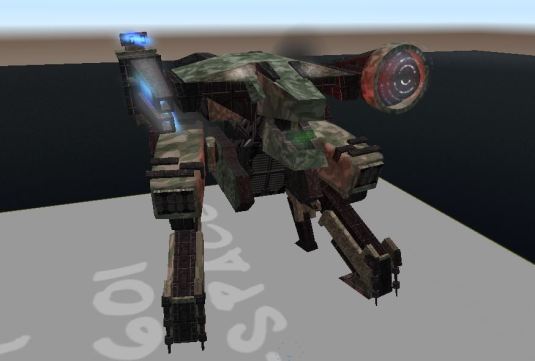
Hello and welcome to my first blog for assignment 3 of MUVE601. In this blog i will covering my progress and development of my metal gear project. Currently i have made some good steps in creating the overall shape of the metal gear using prims ans sculpties.

Image source from peanutbutterwerewolf: peanutbutterwerewolf.deviantart.com/art/Metal-Gear-Rex-37622032
Above is the 3D model i have based my project around; which was very useful due to it having angles from different sides so i could see how to shape each prim and place each intricate detail.

To start the design of the metal gear, i first started with the legs. I took reference from the 3D model and started shaping each prim to match the design. When the overall basic design was finished i then added details such as the spikes on the feet, and cylinders showing through the other prims.

For the top part of my leg i decided to use the sculptie. To create this, i used a scuplting program called Scupltypaint. First it took me while to figure out how to use the program, but after a while i managed to get the shape i wanted; i then exported the file.

Once i exported the file, i then imported it into Second Life and using the sculpted option in the build menu i created the sculptie object and added some prims for extra detail.

Next i had to create the center of the metal gear. Just like the legs, i referenced the 3d model and over the course of a few hours i made it into the shape i wanted using prims.

Finally i needed to create the cannon and radar. Using the 3d image like before i created the cannon and radar. Now i had all the pieces to create the metal gear, i just needed to put them together to make the final build.
Overall i had fun creating the shape of the metal gear which took me a few days to compete, with the hardest part being how to use the sculpting program. The task i have completed so far are:
- The use of at least two sculpties: One with each leg of the metal gear.
- A minimum of 50 and a maximum of 300 prims used in the construction: Turned out to be are 250 prims used.
- At least three different primitive types (i.e. Sphere, Torus, etc.): I used tubes, boxes and sculpties.
Assignment 3 blog 1 – Task Plan
1 blog 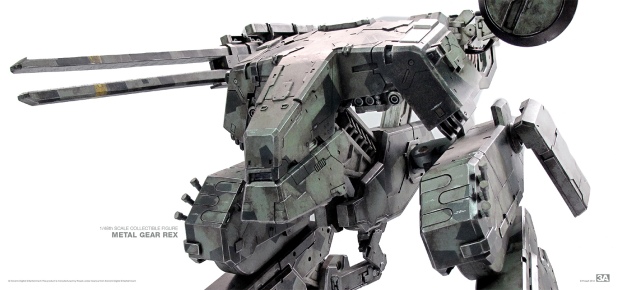
Hello and welcome to my first blog for assignment 3. For this blog i will be covering my task plan for the assignment, this will include what i have chose to do, the learning outcomes that will be achieved and goals that will help me achieve this task.
The option i have chosen
For the assignment i have chosen a content creation build. The content i will be creating will a visually complex model of a “Metal Gear” from the game Metal Gear Solid.
The task and its stated purpose
The task will be to create a visually complex model of a Metal Gear that will cover all the areas required for the assignment, such as the minimum prims needed, adding scripted prim movement, particles and textures .
The overall purpose for the build will be to create a large and complex Metal Gear model which fans of the Metal Gear games can come look and interact with the intended purpose of entertainment.
Learning goals that will be achieved during the assignment
Throughout the assignment I will be learning how to use the in-viewer building tools by creating a complex model of a Metal Gear. The overall learning goals I hope to achieve will be to:
- Learning how to scripted prim movement
This will involve scripting prims such as the arm attached to the Metal Gear that will move via script.
- Learning how to use prims with lighting
This will be done by adding lighting effects to areas of the Metal Gear such as the laser cannon.
- Learning how to sculpt complex prims
This will be achieved by building the complex parts that make the overall design of the Metal Gear.
- Learning how to create and add particle effects
These particle effects will be will be added to the appropriate areas of the Metal Gear.
- Learning how to create and deploy prims with transparency
These prims will be made up to create areas on the Metal Gear such as the windows on the front.
- Learning how to create animated texture
This will be done by adding animated textures to the areas of the Metal Gear which would be appropriate for its design.
Resources that I will be using for the project

Throughout the creation of the Metal Gear I will be referencing images online to help me build the overall model; for example, the 3D model above.

To get ideas of which textures, animated textures and particle effects that I will use, I will be also looking online. An example for texture, and particle effects will come images like the one above.
For the prim scripts such as how the prims will move I will be looking for videos of a Metal Gear moving for reference; for example videos like this:
For guidance for how to use the in-viewer building tools such as scraping, creating prims and adding textures I will look back over the class notes and other resources such as videos for help.
Second Life Community
![]()
Hello and welcome to another blog for MUVE. In this blog I will covering my time spent participating with the Second life community. Though I haven’t spent much time in second life, one of the first communities I joined and places I travelled to was NCI (New Citizens Incorporated).
Name of the community group
New citizens Incorporated.
Description of the group
New citizens Incorporated is a group dedicated to helping, educating and supporting avatars that are new to second life.
This help is provided by a team of volunteers who can help with answering any question a new avatar may ask. Along with general help answering questions, NCI also runs classes and events that new avatars can attend, such as classes teaching Second Life basics, question and answer sessions and teaching new avatars the role playing basics of SL.
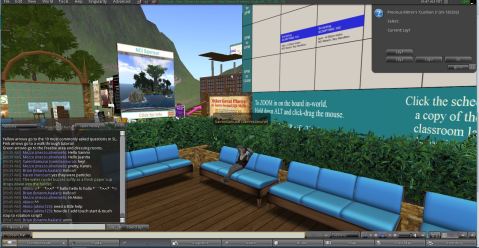
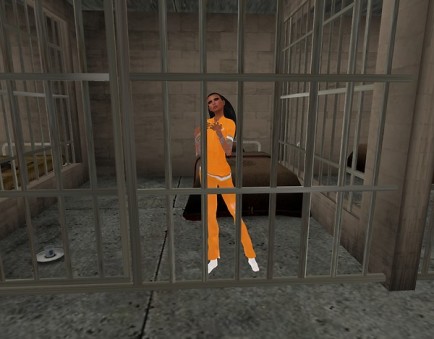
Me chilling out on one NCI couches.
Times I’ve participating in the group
The first time I participated NCI I was looking around for a place I could go to learn the basics of SL, this was so I could blog about it in one of my previous MUVE blogs. After some searching for places new players could go I found NCI in the destination guide, which I then visited. Once there I had a look around information boards and talked to other avatars about what services NCI provided. I also searched for the NCI group and joined it.
The next time I went to NCI was for one of the MUVE classes where it was one of the locations we visited. On that occasion the MUVE class went to NCI to learn about community groups. The class looked around the map and some of us took a hot air balloon ride around the map. Though we didn’t really participate in the community group.
Apart for these two occasions I have also been back to NCI and talked with the other avatars about the community events which I still have yet to attend; which can be little bit difficult due to time differences.
Intellectual property

For my 3rd blog I will be covering the topic of protection of intellectual property within Second Life. As you can imagine within second life there are millions of items that have been created by people;
these items can be sold or given out to other people by the creator and only the creator, because of this these items need to be protected from theft.

How does the permission system help to protect intellectual property?
Using the permission system, the original creator of the item can set whether someone can copy or transfer their item. This gives them full control over what someone else can do with their item which protects from potential theft.
What is Copybot?
Copybot is tool which when used to access second life can export objects out as XML files.
How Copybot can and should be used.
Because Copybot can export items out of Second Life, it can be used for malicious purposes; such as copying someone’s else content, exporting it out and then re uploaded it.
Though Copybot can be used for malicious purposes, it also has legitimate such as exporting content you have created so you can use it in another simulator.
How content creators can protect or open up content for Second Life.
If you are a creator in Second Life and are want to protect your content, you should learn the permission system; this will make sure you are using the correct permissions and are not giving your items away to be copied and re sold for free.
If you wish to open up your content you can also learn which permissions allow for copying or re selling of you content to anyone.
Second Life Permissions
Hello and welcome to another MUVE601 blog. For this blog I will be going over Second Lifes permission system for objects. A couple weeks ago Clare gave our class the task to create and set permissions for some objects made in second life.
This was done in groups or 3, by the end of the task I had a pretty good understanding of the system, though it was a little confusing.
So what are permissions? Permission allow you to decide what people can do to you in game creations. For example, if you were to make a costume in game, the level of permission set on the costume determines what the next owner can do to that costume.
For the rest of the blog I will give a description of each of the levels of permissions and why you might use them.
This image shows the Modify option selected.
1.Modify
The modify permission determines if the next person that owns the object can modify or change the object.
You would only check this box if you are happy for the next person receiving the object can modify it.

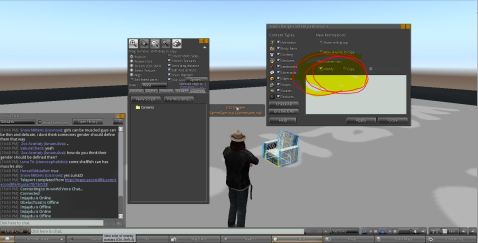
This image shows the copy option selected for a object i have made.
2.Copy
Using the copy permission, the next person to own your object will be able to have multiple copies of your object; for example, they when they spawn the object they will still have the object in their inventory. If you don’t allow copies, when they spawn the object in world the object will leave their inventory until it is picked up again.
You would allow for copies if you are happy with the next owner to have multiple copies of your created object.
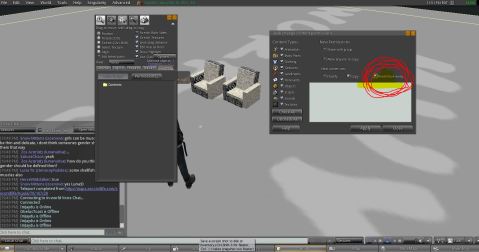
This screenshot shows the transfer check box selected for a object i have created.
3.Transfer
The transfer permission allows for the next person to own the object to ability to give or sell the object to other people.
This option should only be checked if you are okay with the next owner having the ability to sell or give away your created object.
4.Export
In regards to the permission relating to exporting, you can only export textures out of Second Life if you are the creator of the texture, or if the full permissions come under your Second Life name.
If you are not the owner or do not have full permissions you will not be able to export the textures.
Second Life Community Standards
Welcome to my first of my blogs for assignment 2 for MUVE601. For this blog I will be cover Second Life’s community standards.
Currently, Second Life has six community standards, known as the “Big six”. All avatars must follow these standards to avoid temporary or permanent suspension. These Six standards are:
- Intolerance
All avatars must be tolerant towards each other and may not cause offence or harm based on another avatars race, gender, ethnicity, religion or sexual preference.
- Harassment
Avatars should not harass other avatars; this could be considered as using offensive or annoying behaviour.
- Assault
Avatars must not in areas identified as safe zones push, shove, shoot other avatars; or in general assault another avatar in way that will cause annoyance.
- Disclosure
During your time in second life you must not disclose real life personal information about other avatars unless they give you permission. This includes, names, gender, age, race, sexual preference, alternate accounts and real life location. Chat logs must not be given out unless with permission too.
- Adult Regions, Groups, and Listings
Mature and adult activities or content are not permitted on Second life mainland and must be undertaken on Second lifes adult continent called Zindra or on private regions.
- Disturbing the Peace
While in Second life avatars must not conduct disruptive behaviour such as disturbing in game events, using annoying or repetitive noises, following other avatars or spawning items that may slow the server down.
For more information on Second lifes community standards follow this link here.
Why does Second Life have community standards?
These standards are in place to make sure all the residents of Second Life are able to enjoy the virtual world without the fear of people hindering their experience through the outlined standards such as harassment, intolerance, assault or being exposed to unwanted adult content.
How should you avoid violating these standards?
To avoid breaking the community standards you should first read over the outlined standards to get an idea on what is and is not allowed on the Second Life mainland. Another thing you could do is ask other avatars or read the rules for the region you wish to take part in.
What to do if you see someone breaking the community standards
If you think someone is breaking the any of the community standards, you can report them using the “Abuse Report Tool” located under the help menu in Second Life.
Second Location – Social Island
Welcome to my 5th MUV500 blog. In this blog I will be checking out another location in Second Life. For the second location, I wanted to visit a place where I could go as a newcomer and meet other new avatars. For this I went and had a look though some of the destinations on the Second Life website and found the Social Island.

People socializing.
Intractability in the Social Island
Social island is location in second life where new avatars can go and socially meet other avatars, new and old. On the island there is a beach with a fire pit and seats around it and huts located over the beach making it an ideal place where you can go and talk to other avatars.
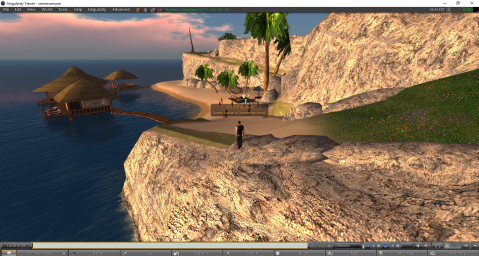
Overlooking Social Island.
The look and construction of Social Island
Looking around the island I could see the people that had constructed it had put a lot of effort into giving it an overall social feeling. The beach was made looking out over a sunset across the sea with rocks and an upraised island behind.
To make the island, they would have first created the terrain of the island and added rock and grass textures on top of it. To create a more tropical feel, prims in the shape of topical trees were made and texture added to them.
Looking over the island I could see the most detailed parts that were created would have to be the ocean huts. These where made with a wooden texture on the outsides, straw like textures in the roofs and transparent windows on the sides.
Some of the scripting I seen was the fire pit, which gave of a glow and fire animation.

Overlooking New Citizens Incorporated.
Comparison to other newbie locations
The other newbie location I visited was New Citizens Incorporated. This location compared to Social Island was place you could go and get help as a new avatar with everything Second Life related.
There were easy to follow tutorials posted around the place such as a for example a billboard showing the“19 of the most commonly asked questions, answered”.
My impressions
Overall I found Social Island and New Citizens Incorporated were great locations for new avatars to go and meet new people and get friendly help if they needed it. It was pretty cool to see people giving their free time to help new avatars.

Recent Comments